


-
Call Now +86 13693186054
-
Any Questions info@yitaflexstone.com
MCM Flexible Stone Installation Guide

A successful MCM flexible stone installation starts with proper preparation and a clear installation sequence. The typical installation process includes substrate inspection, layout marking, sheet cutting, adhesive application, positioning and gentle compaction, joint inspection, joint filling, and final cleaning and protection. Following these steps in the correct order helps achieve better alignment, full adhesive contact, cleaner joints, and a more stable finished wall surface.
Installation Sequence for MCM Flexible Stone Tiles
- Inspect and prepare the substrate: Walls should be solid, clean, free of hollow spots, and free of leaks.
- Layout Markings: Determine the positions of horizontal and vertical lines, as well as joint locations.
- Cutting the flexible stone sheets: Cut according to the layout dimensions and check the grain direction.
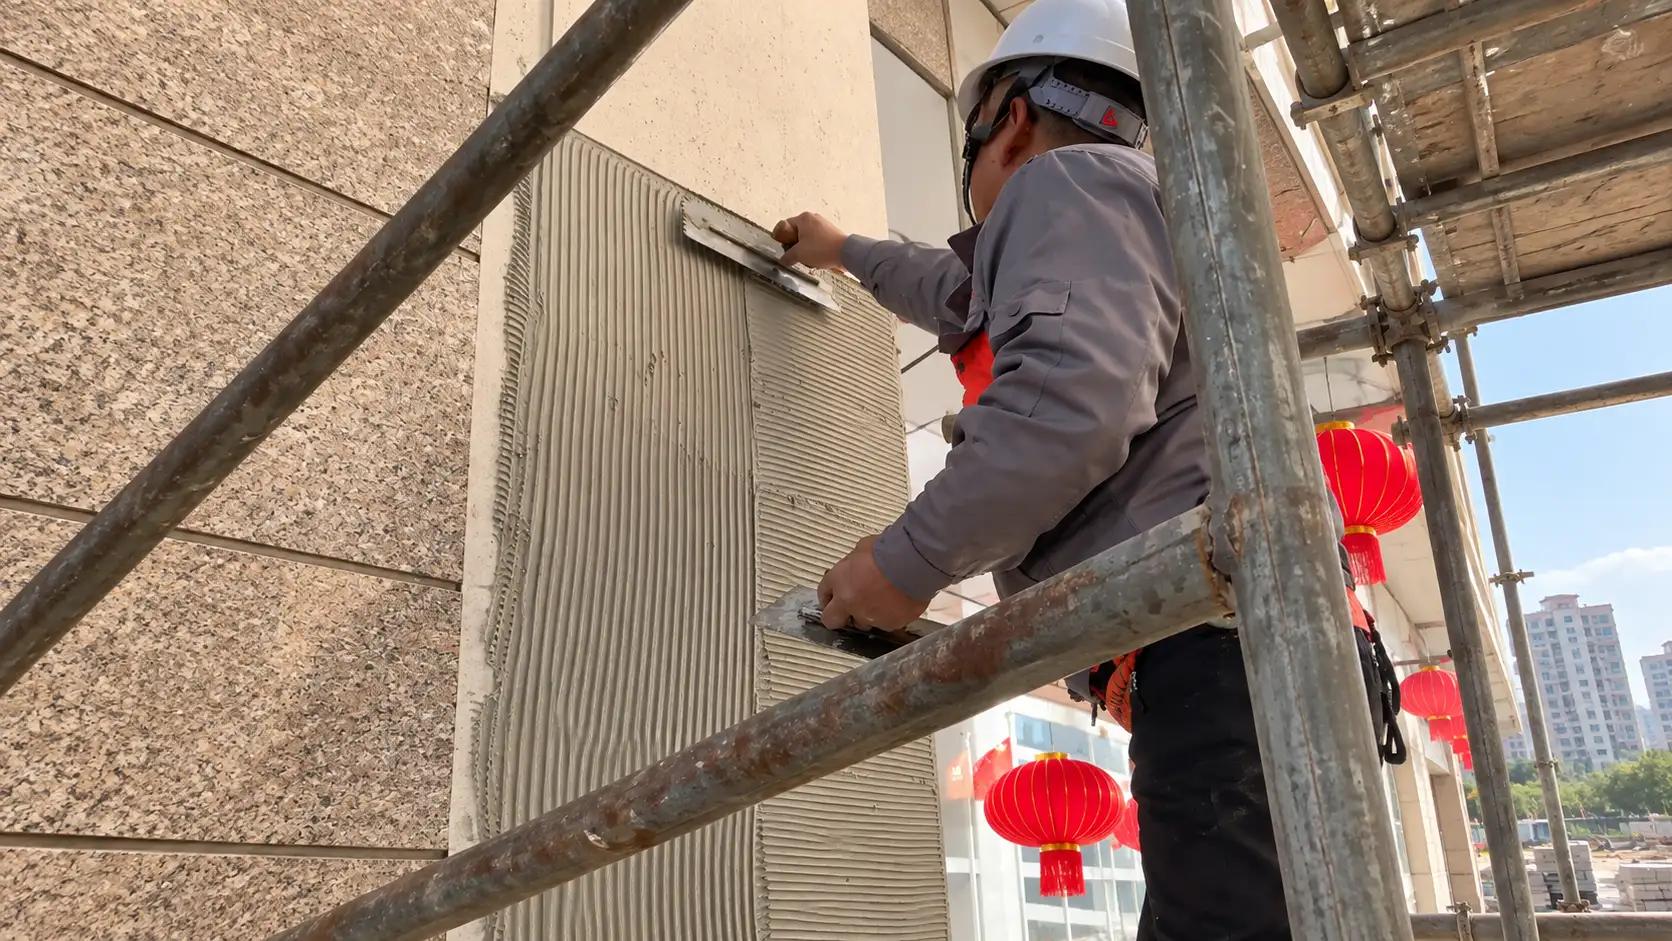
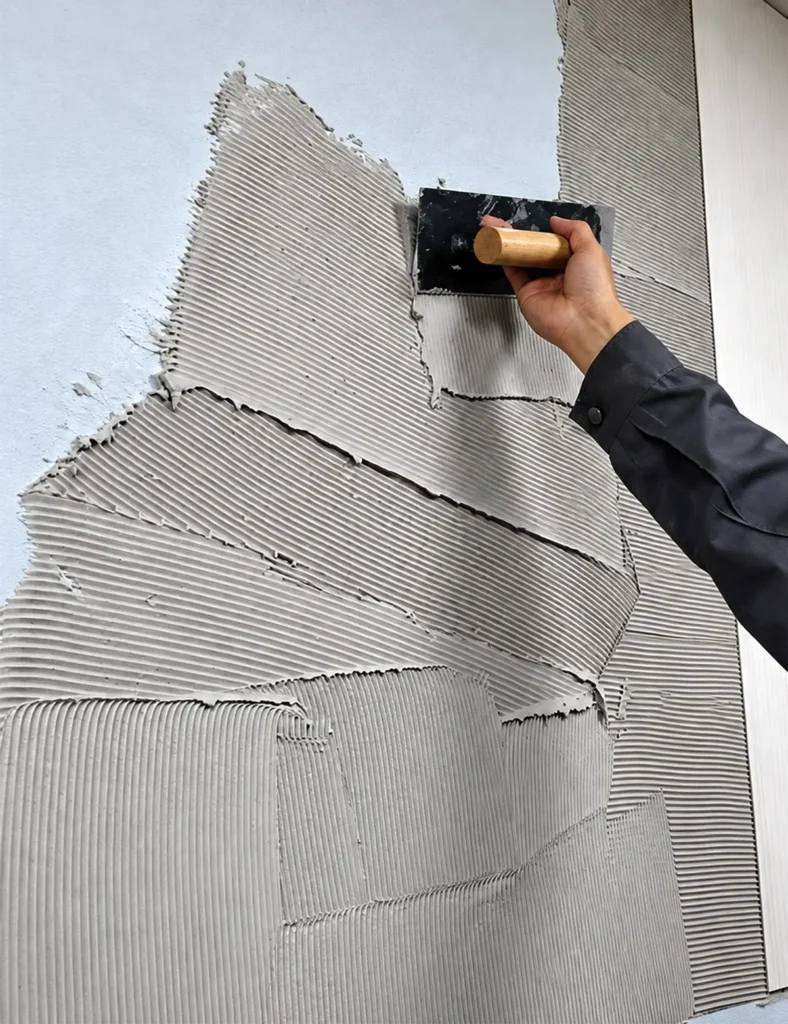
- Applying Adhesive: Apply a uniform coat of flexible adhesive mortar to the wall and the back of the flexible stone, then use a notched trowel to create a uniform texture in the same direction, ensuring that the mortar thickness and texture direction are consistent.
- Laying and Compacting: Position the tiles accurately, then compact them from the center outward to prevent hollow spots.
- Sealing Joints: Clean the joints and fill them with weather-resistant sealant.
- Inspection of Key Areas: Check the edge seals, paying particular attention to corners, window edges, eaves, and the base of the walls.
- Cleaning, Maintenance, and Inspection: Provide rain protection and document the inspection results.
Tools and supplies needed for installing flexible stone:
Preparing the correct tools and materials before installation helps keep the work accurate, efficient, and consistent. The exact equipment may vary depending on the substrate, product texture, and whether the project is indoors or outdoors, but the following items cover most MCM flexible stone wall installations.
Preparing Tools
Tape measure, level, chalk line, cutting tools, notched trowel, rubber float, pressure roller (suitable only for certain types of panels with shallow textures), caulking gun, cleaning supplies (dry sponges, dry cloths, etc.), air compressor, and pneumatic nail gun (optional; for indoor use only).
Preparing Auxiliary Materials
C2S1 flexible adhesive mortar (for exterior walls requiring full-surface adhesion, use a low-cost cement-based mortar; for interior walls that do not require full-surface adhesion, a non-cement-based flexible adhesive may be used), necessary substrate leveling materials, water-based primer (required for certain substrate surfaces), masking tape, and weather-resistant sealant.
Inspecting and Preparing the Substrate
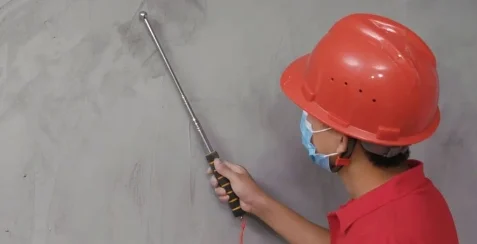
Complete full‑scale substrate inspection before starting MCM flexible stone installation work.
Instructions for On-Site Inspection and Handling
Use a straightedge and visual inspection to check the wall surface for obvious unevenness, cracks, or loose areas.
Tap suspicious areas: If you find hollow spots, sanding, or powdering, remove and repair them first.
Remove oil stains, loose dust, moss, and other contaminants; check the wall for water seepage.
Cement mortar substrates must have reached the specified curing stage; smooth substrates should undergo surface treatment according to the specified system.
If there are significant variations in the substrate’s surface color, determine—based on the selected flexible stone product—whether a uniform-colored alkali-resistant primer coat is needed to prevent color bleeding on the finished surface.
Do not judge old tiles or stone solely by their appearance: ensure the original finish is firmly bonded to the substrate, and remove the old finish if necessary.
Satisfactory Performance
The substrate must be solid, level, and clean, with no noticeable variations in color, and its moisture content must meet the requirements of the selected adhesive.
No Construction Allowed
Persistent leaks in the walls, chalking of the coating, loose old tiles, and structural defects in the substrate that have not been repaired.
Project Note: Metal panels, glass, tiles, and high-rise building facades require specialized design or system verification.
Measuring, Marking, and Laying Out Flexible Stone Tiles
Mark the position accurately first, so the panels won’t get crooked as you install them.
Instructions and Details
- Use a tape measure to measure the length and width of the construction area, as well as the dimensions of door and window openings.
- Use a spirit level or laser level to establish a reference line, then use a chalk line (or chalk marker) to mark horizontal and vertical alignment lines.
- Lay out the panels on the floor or in a sample area to confirm the color, grain direction, and joint placement.
- Number the cut pieces for the corners and around doors and windows in advance to avoid having to piece together fragments that are too narrow at the last minute.
- Confirm the joint width before starting work; for general reference, a joint width of approximately 5 mm can be used for layout purposes, but this is not a universal standard.
Satisfactory Performance
Lines are horizontal and vertical; the dimensions and grain direction of the panels have been verified; and the layout clearly specifies the locations of joints and connections.
No Construction Allowed
Installing directly on the wall without a trial layout; boards that are too narrow at door and window openings; grain patterns installed in the wrong direction; failure to account for building expansion joints.
Cutting and Pretreatment of MCM Flexible Stone Tiles
Measure twice, then cut once to ensure there are no cutting errors.
Instructions and Details
- Draw the cutting lines on the back of the sheet or in areas where marking is permitted, according to the layout plan.
- Thin, lightly textured panels may be cut with a knife using methods permitted for the product; for deeply textured panels, select the appropriate cutting tools.
- Keep the sheet supported while cutting to avoid pulling on the fiberglass mesh on the back.
- Remove any debris from the edges and check for delamination, chipped edges, or surface damage.
- For projects requiring the installation of corner components, first test-fit the corner or irregular-shaped pieces to ensure a clean and aesthetically pleasing joint with the flexible stone. Be sure to use weather-resistant sealant to fill any gaps between the components and the structural elements.
Satisfactory Performance
The dimensions are accurate, the cuts are neat, and there is no visible damage to the panels or backing structure.
No Construction Allowed
Forcibly bending thick, textured products; cutting sheets while they are suspended in the air; failing to check dimensions after cutting.
Project Note: Just because a product is “flexible” does not mean that all of its contours can be bent at right angles; this must be verified for each specific product.
Apply the flexible adhesive
Flexible adhesives must be applied according to the standard; there are slight differences between indoor and outdoor application—it’s not just a matter of randomly dotting a few beads of adhesive at the four corners.
Instructions and Details
- Check the flexible adhesive label: Verify that the product meets the C2S1 standard and is suitable for exterior walls, compatible substrates, and the back of flexible stone. Check for visible clumping, drying out, or abnormal separation; if stirring is required, follow the manufacturer’s instructions only.
- Exterior Wall Installation: Use a notched trowel to apply the adhesive evenly to the prepared substrate or the back of the flexible stone panels. The thickness of the adhesive layer—ranging from 1 mm to 5 mm—depends on the type and weight of the flexible stone; whether to apply it to one or both sides should be determined according to the system specifications. Ensure the adhesive layer is continuous and that the edges and corners of the panels are fully covered, and complete the installation within the effective open time.
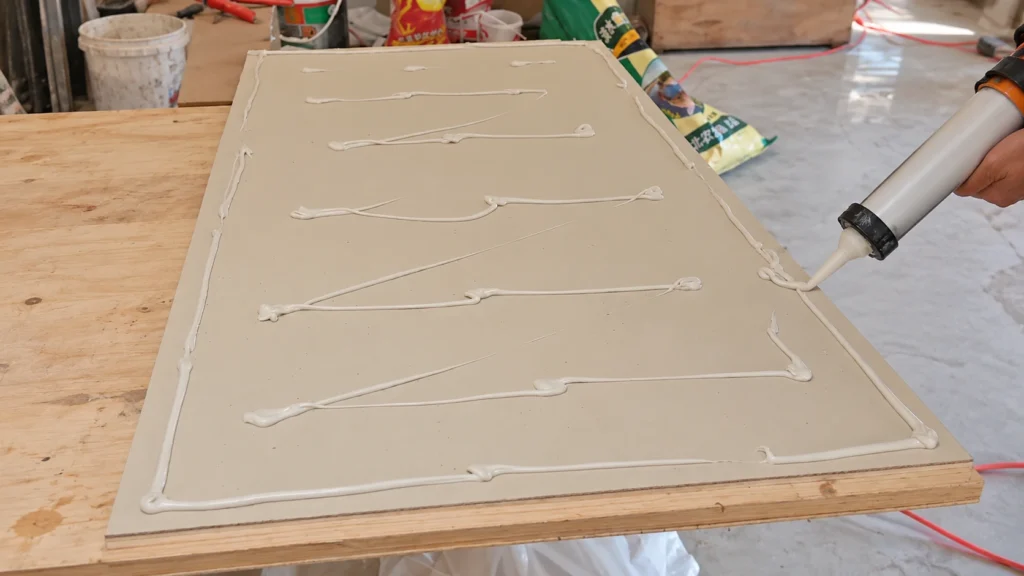
- Interior Wall Installation: When using a cement-based flexible stone adhesive, follow the exterior wall installation procedure; in dry indoor environments, a non-cement-based flexible adhesive may be used. Apply the adhesive to the back of the flexible stone using a caulking gun, forming a ring 3 cm from the edge all around the panel while leaving a 5 cm air vent. Apply the adhesive evenly in an S-shape pattern in the center without connecting it to the outer ring, as shown in the illustration. When installing large-format flexible stone or on curved surfaces, secure the edges with air nails.
Satisfactory Performance
Exterior Wall Requirements: The adhesive application must be continuous and uniform; after installation, a test panel must be used to verify that the adhesive has transferred fully and that there are no visible air pockets.
Interior Wall Requirements: After installation, there must be no wrinkles, trapped air must be able to escape, there must be no hollow spots, and the edges must not be curled up.
Incorrect Implementation
Excessive water was added to the flexible adhesive; an adhesive intended for interior use was applied to exterior walls; installation proceeded after the adhesive layer had formed a skin; adhesive was applied only in spots, or there were gaps in the adhesive coverage at the edges and corners. During interior installation, no vent holes were provided when applying the adhesive.
Project Note: The adhesive layer thickness of 1–3 mm or 3–5 mm depends not only on the weight of the flexible stone itself but also on the performance and quality of the flexible adhesive; these are not confirmed parameters of the YITA installation plan.
Position on the wall, apply, and press
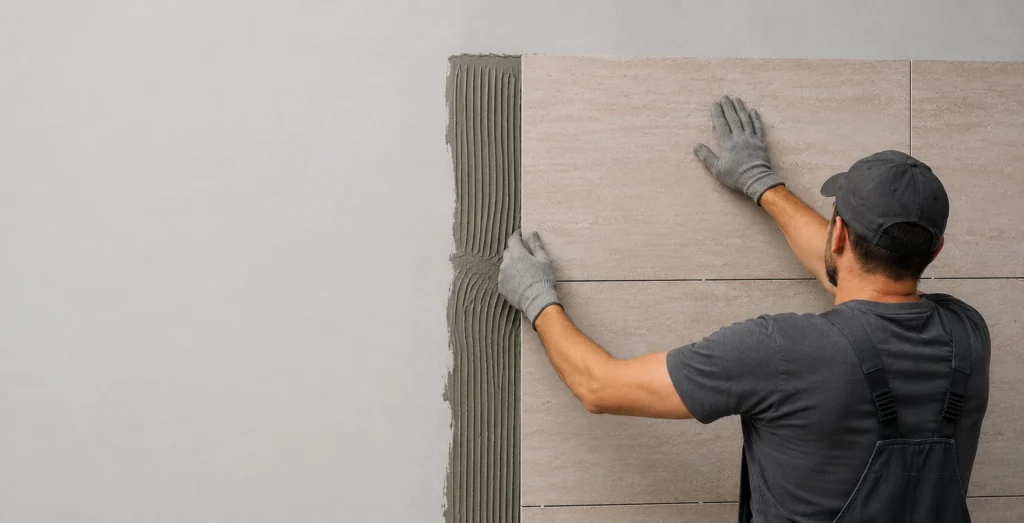
Flexible stone should be installed starting from the top and working downward. After applying the flexible stone titles, ensure that the adhesive bonds evenly and thoroughly to the back of the panels.
Instructions and Details
- Align the panel with the positioning lines and apply it to the wall within the working time allowed by the flexible adhesive.
- Fine-tune the position so that the seams and texture run in the same direction; large-format flexible stone requires the coordinated efforts of two or more people.
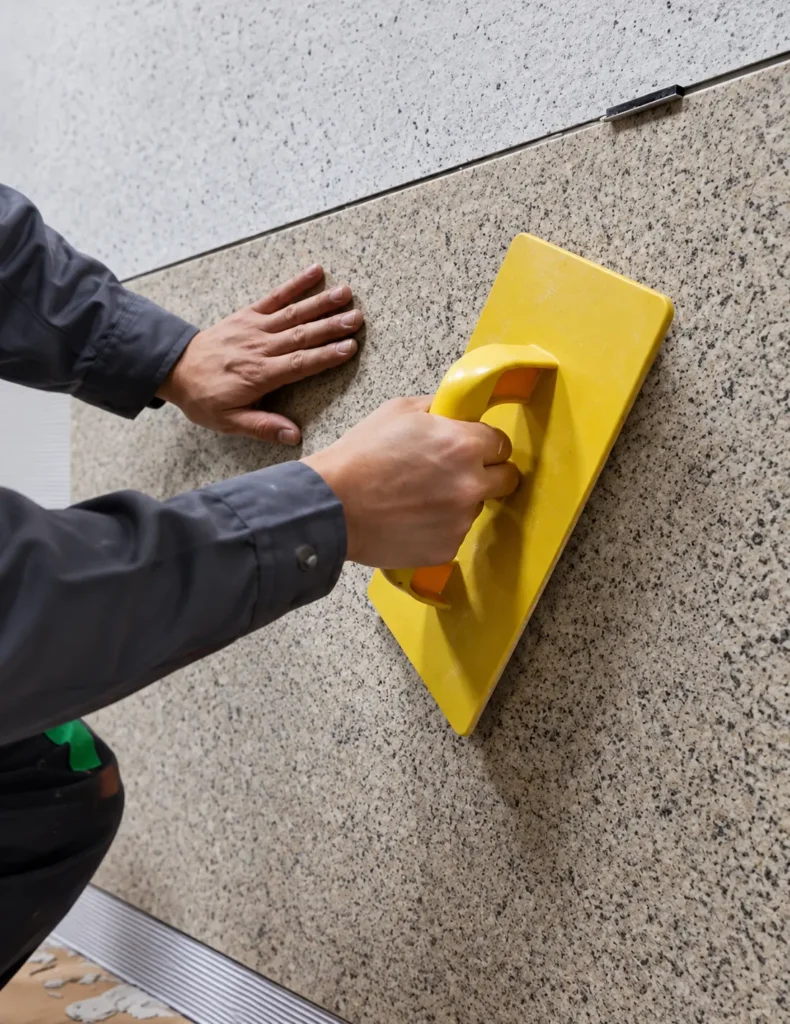
- Use a rubber tamper or a suitable compaction tool to gradually compact the material, working from the center outward.
- Check the flatness of the four corners, edges, and adjacent surfaces of the panels as you go.
Satisfactory Performance
The panel surface is flat, the seams are even, and there is no noticeable curling at the edges; a test peel of the panel indicates sufficient and effective adhesion.
Common Mistakes
Pressing only the center and not the edges; damaging deep textures by tapping with a hard tool; forcibly adjusting the position after the adhesive layer has dried.
Filling Gaps, Sealing, and Cleaning
Seams aren’t just for aesthetics; they also affect how the material responds to rain and temperature-induced deformation.

Instructions and Details
- Leave the joints between slabs as designed; do not seal the building’s original expansion joints or settlement joints.
- Clean any excess adhesive and loose dust from the joint, and maintain the joint in the condition specified by the sealant manufacturer.
- Apply a weather-resistant exterior wall caulk compatible with flexible stone in continuous beads. Once the caulk has partially dried, use a caulk smoothing tool appropriate for the joint width to compact it, then wipe away any excess caulk with a dry cloth or sponge to keep the surface of the flexible stone clean, and peel off the masking tape.
Satisfactory Performance
The sealant joints are intact, continuous, and smooth, with no gaps or visible contamination; the expansion joints are fully functional.
Common Mistakes
Treating a 1-mm natural joint as a waterproofing design; sealing expansion joints with ordinary rigid joint filler; applying sealant over dust.
Project Note: Products from different suppliers come in various joint widths, such as 1 mm, 2 mm, and 5–8 mm; the final selection must be based on the design and the sealing system.
How to handle corners, doors, windows, and the junction of walls and ceilings
Areas prone to water leakage or impact should be inspected separately and treated with care.
Instructions and Details
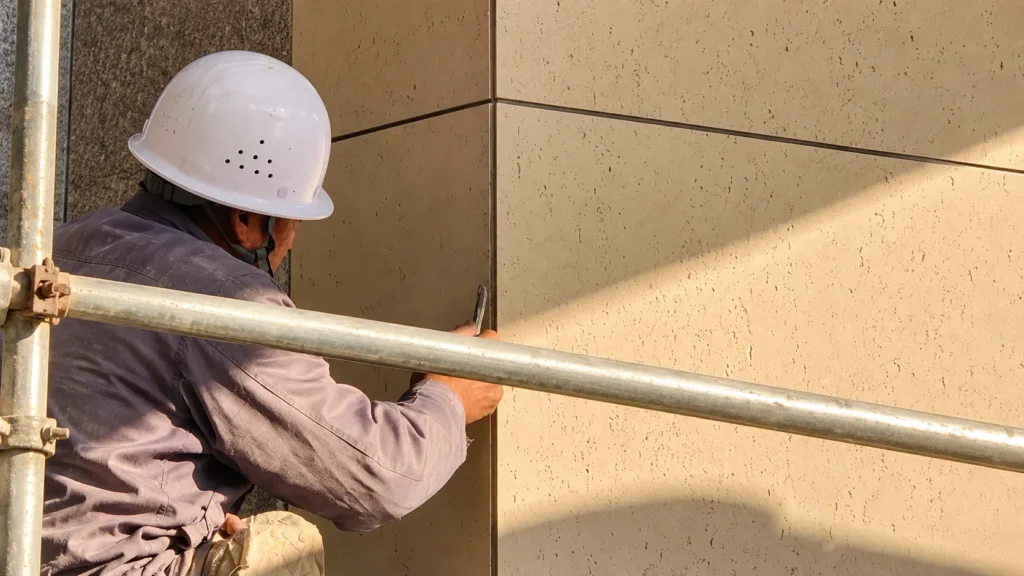
- External and Internal Corners: You may use the corner components specified in the design; alternatively, you may directly use MCM flexible stone to join inside and outside corners. Installation should follow the YITA flexible stone 45° corner installation standards to prevent an uneven appearance or even cracking at the corners.
- Near the Window: Be sure to preserve the drainage holes in the window frame, and check the drainage slope of the windowsill, the flashing, the drip edge, and the sealing of the edge joints.
- Parapets and Wall Tops: Inspect the coping, flashing, and finishing details designed to prevent rainwater from flowing back. The edges of flexible stone in exposed areas at the top must be sealed with weather-resistant sealant to prevent rainwater from flowing back.
- Base of the Wall: Do not block existing drainage openings in the wall to prevent the finish from being exposed to prolonged water accumulation. If the bottom edge comes into direct contact with the floor, apply a waterproof sealant to prevent water penetration; use weather-resistant sealant or other flexible waterproofing materials to seal the gaps at the bottom.
45° External Corner Installation Details
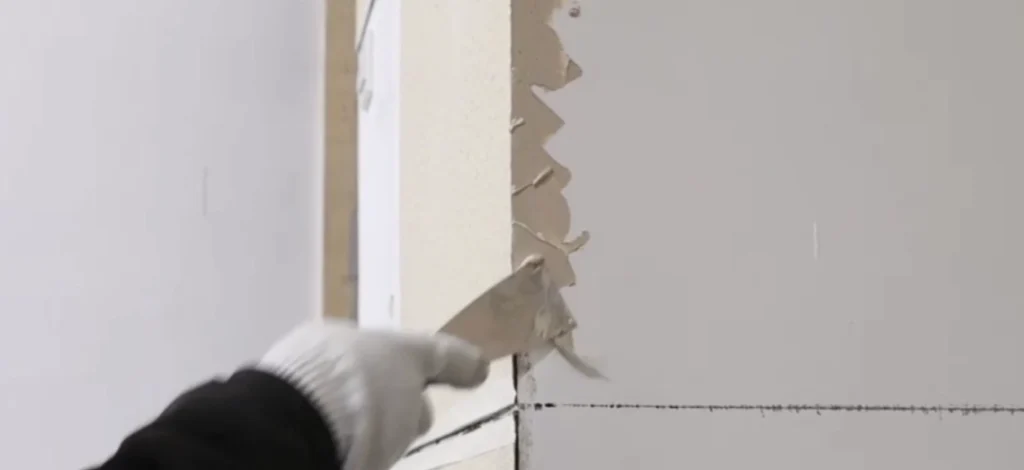
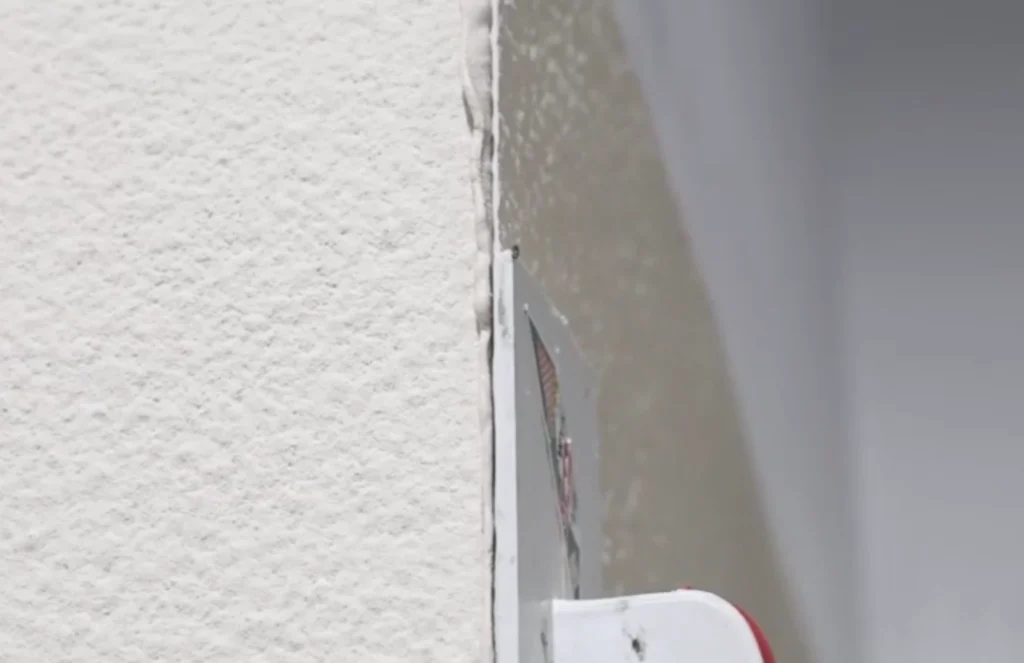
- External Corners: You may use the corner components specified in the design; alternatively, you may directly use MCM flexible stone to join outside corners. Installation should follow the YITA flexible stone 45° corner installation standards to prevent an uneven appearance or even cracking at the corners.
- Install the flexible stone panels on the front facade so that the 45° beveled edge extends slightly beyond the corner of the wall.
- Apply weather-resistant sealantto fully fill the gap between the flexible stone and the wall substrate, ensuring continuous support along the corner edge.
- After installation, gently tap the flexible stone with a beating board to ensure firm, even contact. Allow the excess weather-resistant sealant to squeeze out naturally so it fully fills the inside of the 45° corner joint.
- Once the excess weather-resistant sealant is semi-dry, carefully remove it with a putty knife and clean the corner joint for a neat finish.
45° Internal Corner Installation Details
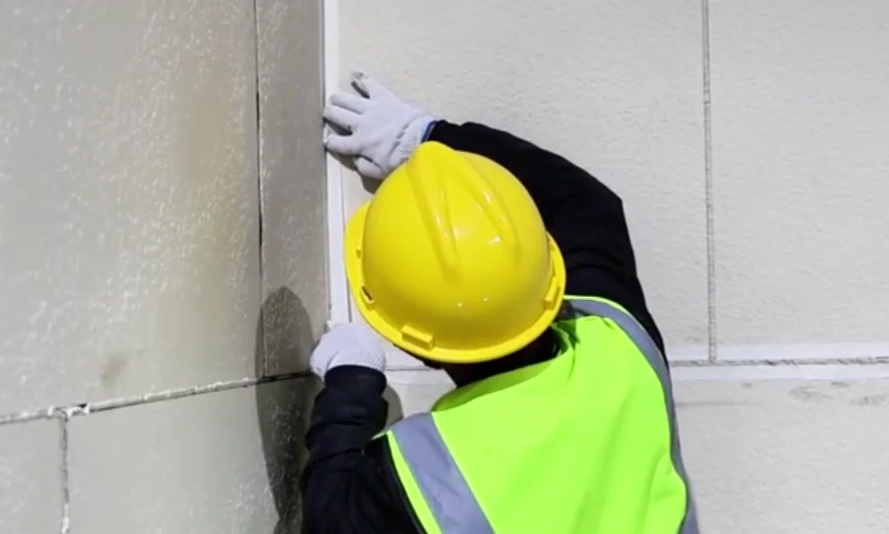
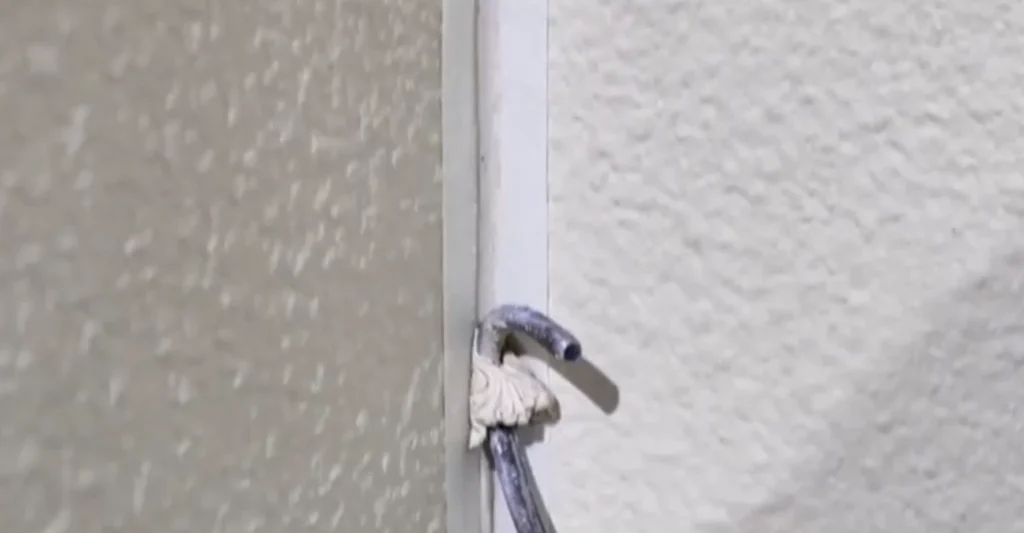
- After installing the flexible stone at the internal corner, apply masking tape along both sides of the joint to protect the surface from sealant contamination during joint filling.
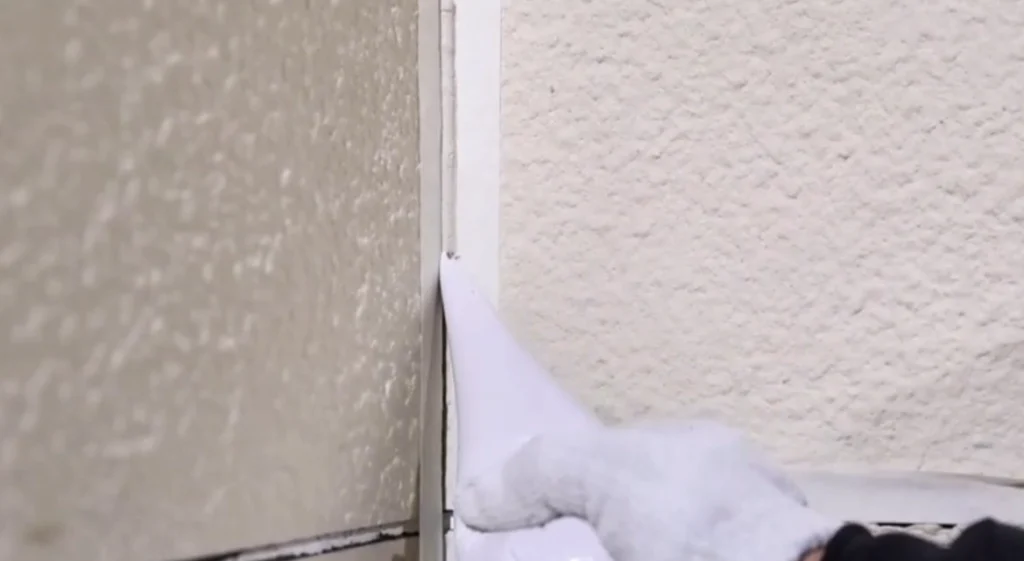
- Use a caulking gun to inject weather-resistant sealant evenly into the internal corner joint, ensuring the gap is fully and consistently filled.
- Once the sealant reaches a semi-dry state, use a jointing tool to firmly compact and shape the joint, creating a deep, neat and well-defined recessed finish.
- Once the joint sealant has largely set and holds its shape, carefullyremove the masking tape from both sides of the internal corner.
- Finally, wipe the area clean with a dry cloth or dry sponge to removeany remaining residue and leave the flexible stone surface neat and clean.
Satisfactory Performance
The corners are secure and neat; the original waterproofing and drainage functions of the windows, eaves, and wall tops have not been compromised.
Common Mistakes
Relying on the panels themselves to serve as the waterproofing layer; covering the drainage holes in the window frames; and using sealant in place of necessary flashing components.
Troubleshooting Common Errors
If an abnormal situation is detected, first investigate the cause, then decide whether to continue construction.
Hollow Spots in Panels
- Possible Causes: Loose dust, adhesive leakage, skin formation on the adhesive layer, insufficient compaction
- Initial Action: Stop continuous installation, inspect the substrate and adhesive layer, and re-evaluate the installation process.
Curling Edges on Panels
- Possible Causes: Insufficient adhesive application at the edges and corners, uneven substrate, or disruption of the curing process.
- Initial Action: Inspect the bonding at the edges and corners and the substrate; replace as necessary.
Cracks in Joints
- Possible Causes: Inappropriate joint width or sealing material; blocked expansion joints.
- Initial Action: Verify the joint design and sealing system; do not simply apply sealant to the surface.
Water Seepage on Walls
- Possible Causes: Defects in the window flashing, improper finishing at the junction of the wall and ceiling, or leaks in the original substrate.
- Initial Action: First, locate the source of the water and repair the waterproofing and drainage system.
Irregular Grain/Color Variations
- Possible Causes: Failure to perform a test run, mixing different batches, or incorrect orientation.
- Initial Action: Stop production, verify the batch and orientation, and confirm the sample first.
Immediately Halt Work
If extensive delamination of the substrate, persistent leaks, obvious material incompatibility, abnormal delamination, suspected structural issues, or a risk of falling from heights are discovered.
FAQ
Should MCM Flexible Stone Be Installed from Top to Bottom or Bottom to Top?
MCM flexible stone is generally installed from top to bottom. This helps prevent excess wet mortar from dripping onto finished panels and reduces the risk of stains, hollow spots, warping, or shifting before the adhesive cures. Because flexible stone is thin and lightweight, it does not rely on lower rows for support. A top-down sequence also makes it easier to keep horizontal joints aligned.
Is it necessary to install expansion joints with MCM flexible stone?
In dry indoor areas, flexible stone can be installed with or without visible joints, depending on the design and product type. For exterior walls, it is generally recommended to leave a joint of approximately 3–5 millimeters to prevent cracking and spalling caused by freeze-thaw cycles and thermal expansion and contraction; the joint should be sealed with a suitable weather-resistant sealant.
How Can Hollow Spots and Poor Bonding Be Avoided?
Proper substrate preparation and adequate bond contact are critical. Apply the adhesive mortar evenly, carefully position the flexible stone panels—avoiding repeated repositioning—and gently tamp them down with a trowel to enhance contact between the flexible stone and the substrate. For exterior wall installations, it is especially important to ensure that the adhesive mortar provides complete coverage to minimize the risk of delamination or air pockets. For interior installations, ensure that the vent holes left in the adhesive allow internal air to escape and the material to settle properly.
Conclusion
Successful MCM flexible stone installation depends heavily on systematic substrate inspection, correct material selection, and strict adherence to standardized operating procedures. This step‑by‑step guide covers tool preparation, substrate treatment, sheet cutting, C2S1 flexible adhesive application, top‑down panel mounting, corner finishing, joint sealing and on‑site troubleshooting for both interior and exterior cladding projects.
Substrate stability is the foundation of long‑term performance. Loose, chalking, leaking or structurally defective walls must be fully repaired before installation begins. Exterior façades demand full‑coverage adhesive, proper joint width and weather‑resistant sealant; interior dry‑area projects can adopt simplified adhesive schemes while reserving air escape space to avoid hollow spots. Top‑down installation helps prevent mortar contamination on finished panels and reduces displacement risk before the C2S1 adhesive achieves full curing. Common failures including hollow spots, curling edges and joint cracking usually originate from poor substrate preparation, incorrect adhesive type or inadequate compaction.
Note that MCM flexible stone installation specifications differ between indoor and outdoor scenarios, and special‑condition projects such as high‑rise façades or metal substrates require additional system verification. If you want to deepen your understanding of material characteristics, curved‑wall construction or adhesive selection, refer to our related technical articles. Project‑specific technical datasheets and sample support are available by contacting the YITA technical team for your cladding specification.